Next Show: April 20th & 21st, 2018


Home i Event Info i Tickets i Classes i Vendors i FAQ's

Showing posts with label Jennifer. Show all posts

Tuesday, November 26, 2013

Give Thanks


I have been loving the variety of burlap that has popped up everywhere-ribbon, colors, patterns, so many possibilities! It's so much fun. And the perfect match for fall. 

Die Cuts With A View is known for their gorgeous papers and their Spiced Cider Stack did not disappoint! Plus, they now have a burlap 6x6" paper stack that I have fallen in love with. The two stacks were a match made in heaven. I made several things with them, and this is the first project. 

Because the burlap paper is so easy to work with, I knew I'd be able to pull of making some medallions with both paper stacks. I made two different sizes. Here are the supplies needed.

Supplies
DCWV Spiced Cider Stack
DCWV Burlap Stack
Hot Glue (Lots!)
wooden dowels
vase & shred
Scoring Tool (I have a Martha Stewart one)

They were all made the same way. Here's how to do it! The Burlap took some extra patience because it's pretty thick but it worked well. I used my scoring tool to score one 6x6" piece from the pad every 1/2". Once 6" sheet makes half of the medallion. To make it into a fan, fold along the score lines and then pinch it in the middle. Bring the two middle sides from the pinched point up together and secure with hot glue (this will leave one side flat). Do the same thing with the other side and then hot glue the two of them together along the flat one sides of each half. For one of the medallions, I scored 1/2" along some patterned 6x6" paper and then created a "bow", securing with hot glue as well. The middle was covered up by a graphic from of the of the papers in the Spiced Cider Stack. 

For the metallic medallion, I used the same method as the burlap, except I scored it horizontally and vertically to give it some extra texture.

For the larger medallion, I used the 12x12 papers with two different patterns. It's also the same method (score every 1/2" and then pinch them together and secure). The graphics all came from the same paper in the stack. They were all so cute, I had to use them. 

To finish them off, I used some wooden dowels and hot glued them. I inserted them in some floral foam in a vase I covered with some burlap twine. 

They turned out so cute, I can't wait to do something similar for Christmas. 


I also made a fun little block withe the another medallion. I painted an 8x8" wooden block, modged podged some paper from the Spiced Cider Stack (that I cut down), and then adhered a burlap medallion on it. Another fun way to use the burlap paper!


Friday, July 5, 2013

DIY Washi Chalkboard Clothespins


Have you seen those cute little chalkboard clothespins around the web? There are a bunch of Etsy shops and boutique deal sites that have had them lately. And I came really close to buying some until I realized I had the stuff to make my own! And it's a little easier on the ole' budget too (more money for crafting-yea!).

These were super easy to do, easily personalized, and I'm thinking I'll be making these for all kinds of events in the future-baby showers, birthday parties, and even Young Women events. Here's what you need to make them. Two of the supplies I used came from my favorite daily deal site-Pick Your Plum! If you don't know who they are, you'll want to check them out. As sad as it is to admit, I check their website first thing when I get up in the mornings! Some of their really great deals go quick :)

DIY Easy Washi Chalkboard Clothespins
Wood Wafers (I got mine from The Wood Connection and I've seen them at hobby stores)
Washi Tape (From Pick Your Plum)
Chalkboard Vinyl(From Pick Your Plum)
Wood Clothespins (found in the Target dollar section)


The wood wafers are super thin and come in a variety of shapes. Mine are oval. They did come with small holes, for threading ribbon or twine through, but the hole was covered up by the Washi Tape. First, I traced the wafers on the back of the chalkboard vinyl. Then, I cut around the inside of the tracing, making the shape smaller (so the washi tape would show around the edge of the chalkboard vinyl). I found three of my favorite styles of Washi Tape and covered the wafers with a few rows of each, wrapping the tape around the wafer to secure.


Once that was done, I added the chalkboard vinyl.
 I then cured the chalkboard vinyl by using the side of a piece of chalk and dragging it across the vinyl. This prevents the vinyl from "ghosting" as much. Finally, I used wood glue to adhere the clothespins to the back. Don't ask my why, but I've found that wood glue adheres so much better than hot glue!


These are so cute and I can't wait to make some more in the future. Next time, I'm using squares with dry erase vinyl (also from Pick Your Plum!). 


Wednesday, July 3, 2013

Washi Tape Cabinet Organizer


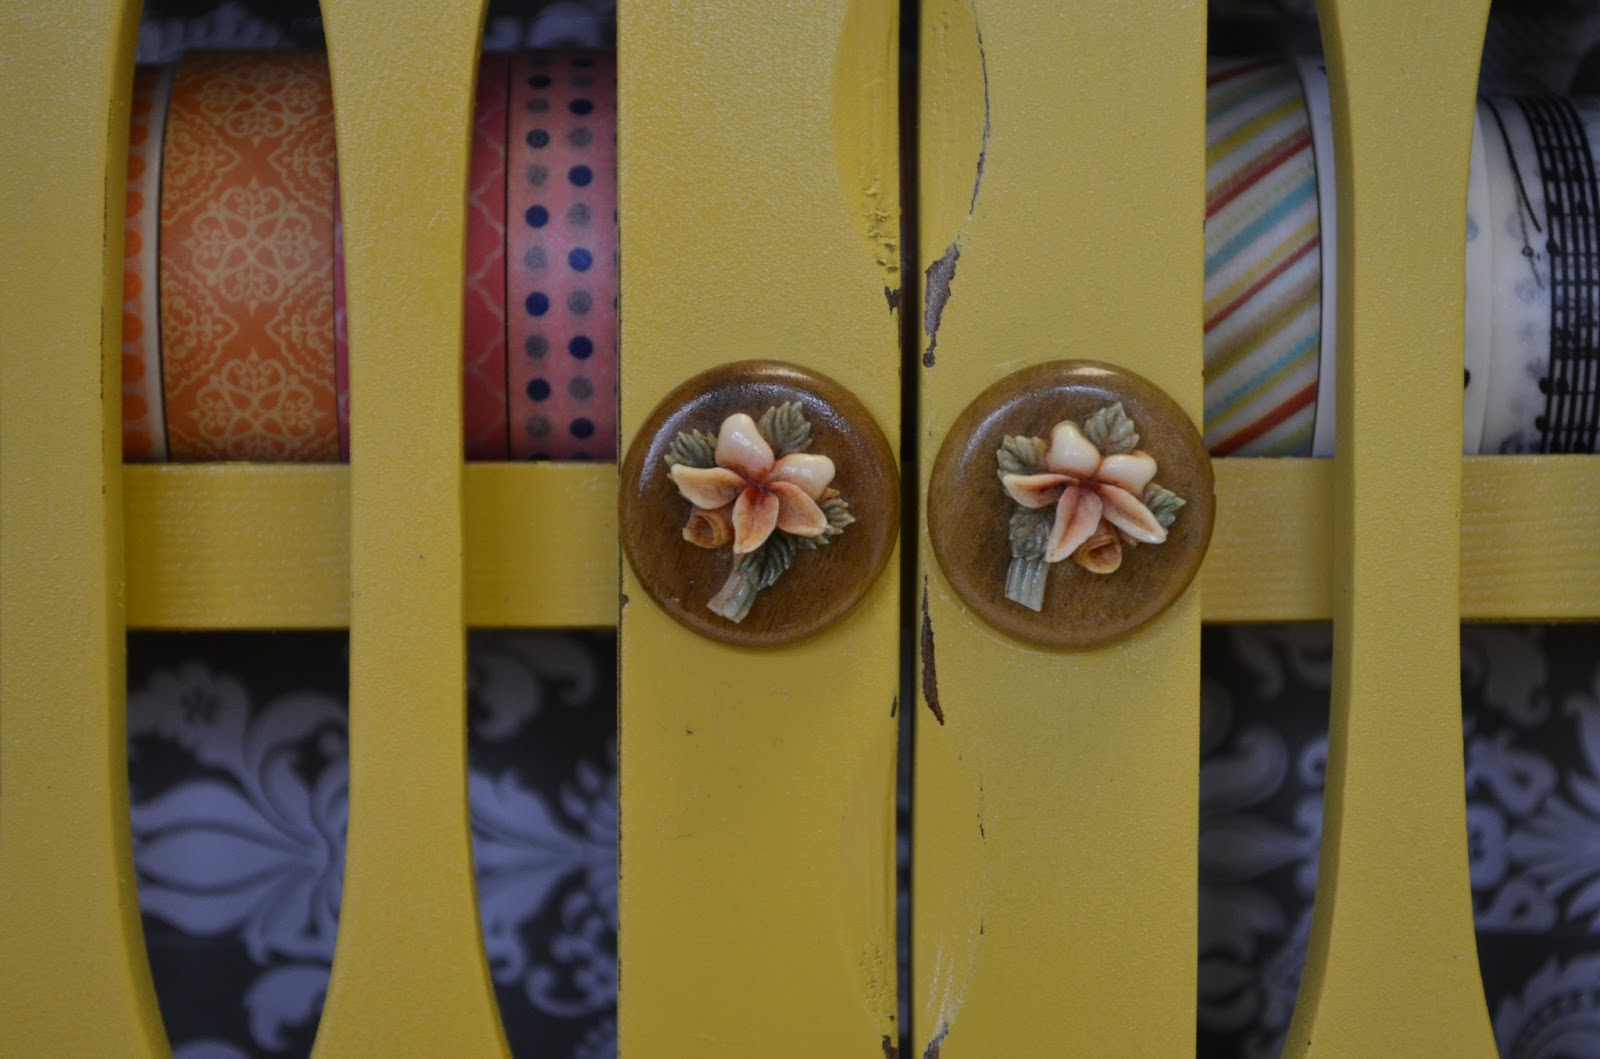
I seriously love finding old things at the DI. It's starting to become an obsession! A few weeks ago, I found this little old spice cabinet there. It was seriously falling apart and had an old, ugly wood finish to it. But, I knew I could give it a coat of paint and it would be perfect in my office/craft space for some of the little things I have laying around. 

All I needed to do was clean it up, get some new nails, and then give it a few good coats of spray paint. I love using Valspar Spray Paint because it has the paint and primer in one! The yellow works with the colors I am doing to makeover my room. 

Once it was painted and I had gone over it again with some sandpaper, to age it a little, I wanted to add some fun to the back of the cabinet. I found this beautiful duct tape by Die Cuts With A View. It has a ton of uses, including using it on furniture. Love!!!! This pattern is a gray damask and matched well. It was easy to measure, the back of the trim has a grid, and they went on easily. The trim is also removable if I ever change my mind about it. 


For the knobs, which were missing when I picked this up, I used some of my Grandma's old costume jewelry. I found this pair of wooden earrings. It makes this project even more meaningful to use something of hers. 

Then, it was time to add my washi tape and glitter. The little shelves hold the Washi Tape perfectly and the little bottles of glitter. Now, I don't have to worry about losing them! And maybe it will keep me from buying more!


Monday, July 1, 2013

Mustache Frame


About a month and a half ago, I snagged some great bare wooden frames from Pick Your Plum at a steal! Since then, I've been trying to decided what I wanted to do with them. The shapes are so cute but do I paint them one color or try something more fun? For one of them, I decided to try something fun and as a gift for Father's Day. I have loved the mustache trend, especially because I have two little guys myself.

It was super simple. I painted the edges orange and then painted the frame cream, being sure to be careful around the edges. Next, I had to make a stencil with mustaches.

The stencil was pretty easy to do with my Silhouette machine. I purchased a mustache shape from their online store, sized it down to the size I wanted and then repeated it. I used the grid in my program to space them out the best that I could. I cut the stencil out on vinyl. I used brown paint to fill in the mustaches, let it dry, and then peeled off the vinyl. And voila! A cute, easy frame to show off our little boys.


Friday, June 28, 2013

DIY Washi Tape Box Organizer

DIY Washi Tape Box Organizer


If you're as big a fan of the Target dollar section, then you probably have a huge stash of things that you think that you'll use someday but never get around to... I'm horrible with it! My closet is full of "projects" and random items. I've had some trouble sleeping lately so I've been catching up on my craft projects. Honestly, it's felt good to get them done. Though I wish I could just get a good night's sleep somedays!

One, or should I say three, of the things I picked up were some kraft desk box organizers. The interiors had different colors and I had one in yellow, black, and red. The outside of them was "naked" and begging for something fun. I have a huge stash of washi tape now, I collect it like I do paper, so I decided to put it to use! And I color coordinated the boxes.

Washi Tape is so easy to work with and requires little clean up too! I really like that part about it. I took my time lining up the tape around the box in strips. The washi tape is from We R Memory Keepers. When I was done with that, I cut some strips of chalkboard vinyl from Pick Your Plum. They are perfect for holding my random little things on my desk. I am a washi tape fan!


Wednesday, June 26, 2013

Boy's Chalkboard Travel Box


My son is obsessed with containers. And I mean obsessed. Wherever we go, he finds them. Last week, I took the kids with me to Hobby Lobby. I know, brave right? While walking down the unfinished wood aisle, Littlefoot found a little wood box with a handle. It looked like a lunch box. He begged me to get the box for him. I decided it would make a fun little project for us to work on together, so I caved and bought it.

When we got home, and baby boy was asleep, I whipped out my paint and foam brush. He was very good at not gobbing the paint on and painted very carefully.


When he was done painting, he also used his markers and crayons to add some more personal touches. We only painted the outside. He insisted on not painting the inside. That was hard for me to do!

Once the paint was dry, it was mommy's turn. I used paper from the Kidlet stack by Die Cuts With A View and measured out the inside portions for the paper. I used four different patterns; one on the outside, one on the inside bottom and two different ones for the sides on the inner part of the box. They were darling papers with fun patterns and textures. Once adhered, I used some modge podge to seal them up.

For the top inside part of the box, I thought it would be fun to have a little chalkboard for him to use. He's really loved using mine and this way, he could have his own and store the chalk in the box. I used my chalkboard vinyl from Pick Your Plum and measured it out. Bam! Done. I did treat the vinyl by rubbing a piece of chalk over the surface and then wiping off.

Finally, the finishing touches. While at Hobby Lobby, I let Littlefoot pick out a couple of prepainted wood shapes. He has shown a love for space things so he chose the Earth and a rocket. Too cute! I love that boy. I glued those down with wood glue on the top of the box. To complete it, I used sparkly chipboard letters from We R Memory Keepers "Noted" line to spell out his name.


He was so excited to see it the next morning when he woke up. I love that little smile. He's been taking it with him everywhere, including to bed, where he draws his fun chalkboard pictures. The box is great for keeping him busy in the car too.


Wednesday, April 10, 2013

Pop Up Card using My Mind's Eye


Hi all! It's Jen here and I recently had the chance to make some cards with My Mind's Eye "Noted" Collection. I really wanted to try something different and thought this type of card would be a fun change. 


To start, score a 12x5" piece of paper every 3", creating four sections. 


Next, score a rectangle one inch from the edges in the middle two sections. The rectangle should be 4x3". Then, carefully cut a slit on the top and bottom score lines. 


Score the "pop-out window" the opposite direction of the middle score line. Add a different paper to the middle and on either side to add more interest. 


Ink edges if you like that look.


Add a length of ribbon to tie around the card. You can either glue it down or leave it loose-it depends on whether or not you want to layer embellishments on top like I did. Be sure to not pull the ribbon too tight because you want the card to be able to open and expose the window correctly.


And here's the finished card, minus the pictures and journaling. I love the idea of this card. It functions as a card and, if the recipient wants, it can be used as a little accordion type album to display. I'm sending this to my Grandma. You could try adding flowers and other embellishments to the window that would pop out in different places-I would have done that too but I wanted a more masculine card to feature my boys.

Saturday, March 30, 2013

Easter Egg Hunt using Scrap Codes

I know Easter is only one day away, but I still wanted to share what we'll be doing Sunday morning. I love Scrap Codes! Their really fun and versatile product utilizes QR codes to personalize whatever you want. When you receive one of their codes, you add the specific code number to your account and then are directed to a page that allows you to upload photos, video, audio, notes, or add a link to something else. I decided I wanted to spice up our little Easter egg hunt and combine it with the popular scripture egg activity where each egg contains something that has to do with the Resurrection.

So, rather than having each egg contain that part of the Resurrection with the scripture, I added the Scrap Codes sticker to each egg and filled them with candy. There will be five eggs total, because my kids are still young and have short attention spans, and the last one will have their stash of fun. Here's some of the eggs and their locations (the codes still scanned just fine even though they were a little folded):


Here's the break down of each egg:

#1-John 13:34-35  Heart
#2-Luke 22: 19-20  Sacrament Cup or Bread
#3-Isaiah 1:18 Snowflake or something white
#4-John 3:16 Cross
#5-Matthew 28:6 Empty Tomb

And here are the links that I used for each one. Because kids are visual, I chose to use either pictures or video for each. The pictures I directly uploaded and the videos I just linked to. It will be fun to run around and find the egg, get the goody, but also be able to talk about Easter and its importance at the same time. It makes it more fun to scan the eggs and find a "treasure" too!


#1-

#2-

#3-

#4-

#5-

If this looks fun to you, you can grab some from their store online!