Next Show: April 20th & 21st, 2018


Home i Event Info i Tickets i Classes i Vendors i FAQ's

Wednesday, October 31, 2012

Happy Halloween!

Happy Halloween! Ange Here! My first project as a new member of the Scrapbook Expo dt! I am super excited!!! I received the super fun DCWV Bewitched matstack and some matching embellies and this is what I put together for you.


    This is my youngest 2yrs ago. He was Tigger and did the cutest little roar face, but it took me all night to get a photo and it ended up a little blurry, so I used it anyway and then added a smaller one of him in full costume. :)

    I cut up some of the papers to make the banners up top and the strips laying across the middle. I also used some papers to mat the photos, fussy cut the little pumpkin swirls to go over my main photo and fussy cut the border along the bottom from 2 papers with the same pattern. I inked all my edges in black, stapled the banners up top and layered all the rest. Then I used a scrap to journal on and added a pull tab, with button and twine, to it so I could hide it behind the smaller photo. Stick your embellies on and you're done!

Supplies:
DCWV Paper Pack & sticker embellies
kraft paper - paper studio
ink - colorbox
staples - CTMH
pen - zig
glue - Tombow
pop dots - eksuccess

Have a SPOOKY and SAFE HALLOWEEN!!

Tuesday, October 30, 2012

Halloween Decor


Hi Everyone, Jennifer here! Only 1 more day until Halloween but if you are still looking to put up some last minute Halloween decor for your Trick - or - Treaters, no worries! This project itself is really simple. Basically, I popped the mirror out of the frame I got at the dollar store and tossed it. I have little ones and didn't want extra glass lying around. Then, I took my papers and decided which space I wanted each to go in. I used the frame itself to trace the different shapes on each piece of paper. Next, I traced the shapes on the cardboard backing to the frame. That way, I would know exactly where I needed to glue each piece down. It saved on the headaches of having to rearrange things. Once I had the pieces all laid down, I modge podged them to the cardboard and put a coat over the top as well as extra protection (I use the Hard Modge Podge).

The frame looked pretty cool with the different papers, especially because of the glitter and foil. I used four pieces of glitter or foil papers and two patterned papers in the middle. It still needed more dressing up. So, I added a pinwheel and used one of the little word art pieces that came in the paper stack for the middle. It says "Eat, Drink, and Be Scary".

Again, it still needed more. I had some great ribbon that I bought at Michaels from their Halloween line (they have a ton of cute ones!) and hot glued it to the top and bottom of the frame. I loved it but still wanted a little more.

So, I added a little Halloween banner, again with more paper from the stack. I used some of my gray baker's twine and hot glued the sides on the back of the frame. I also inked the edges. Finally, I added one more piece of word art from the paper stack with hot glue.

Voila!!!  Have a Happy and Safe Halloween!!

Spooky Candy Box

Andrea here!  We're so close to doorbell ringing and candy flinging!  So here's a treat box I made using the Sizzix Bigz shaker box die and DCWV paper.  Here's a link to DCWV's blog so you can keep up with all their papery happenings!  http://dcwvinc.blogspot.com/


I wrapped a strip of black fabric around the box and stuck a Halloween sprig under the fabric for good measure.  I always scope out the floral picks, garlands and floral sections of the craft stores to incorporate twiggy elements into my paper crafts.


I've always liked this particular box shape because the top is a flap that lifts up and there's a "framed" layer that folds out the other wayI put a pair of my handmade clay eyeball earrings in with some tulle, but the box is also very cute when filled with candy.  If it's small candy, you'd just have to put a piece of clear plastic over the frame opening so it doesn't spill out.


All in all, a good die shape and some good paper.  I like DCWV cardstock for boxes especially because it's sturdy enough to hold up and it has a cool texture to it (and it's textured differently on both sides so you can go heavier texture or smoother texture, depending on your mood).  And if you're into dry embossing, the paper's white core will always allow your embossed shapes to really come to life when you sand over the embossed image.  You can't beat a healthy stash of cardstock for any occasion and season!

Monday, October 29, 2012

Let’s Talk Candy!


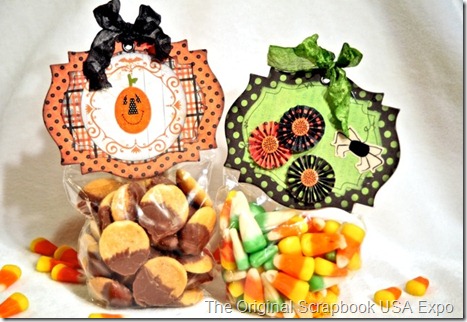
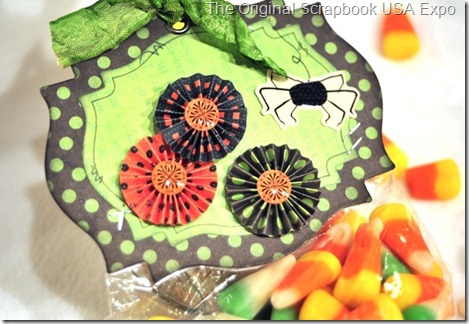
Putting on a Halloween Party this week? How about some fun treat bag party favors? I am not hosting any parties but there are a few days of school until Halloween, so there will be some “surprise” lunch treats for the kiddo’s (they will LOVE these).  My middle schooler will even appreciate finding these fun treats created by Kassi H from our design team.

candy bag topper 2

Product used: DCWV Halloween & Fall stack, DCWV Halloween embellishment flip pack, white cardstock eyelets, seam binding, Distress Ink, Tim Holtz Tiny Attacher,  Spellbinders "Label 18", Quickutz "Nesting Circle" die (on the pumpkin topper)   candy bag topper 4

candy bag topper 3

Notes: The topper base is made from card stock that is folded in half. I then die cut it with the edge of the die slightly off the folded edge. They can then be decorated, and slipped over the top of the bag. I use Tim Holtz Tiny Attacher to secure the topper over the bag. This is a fun way to turn plain bags into personalized party favors.    candy bag topper 1

See more from Kassi over on her blog and have a fantastic day!

Friday, October 26, 2012

“Sew” Cute Ghost Card


Halloween's just a few days away, so I thought I'd whip out a ghost-themed tag / mini card.  To make it, I used DCWV Bewitched paper, fabric, Hero Arts alphabet stamps, Colorbox ink and yarn.  I drew the ghost on white fabric with pencil, then I sewed around it with my sewing machine and inked the edges to add some shading.  After that, it was just a matter of layering the different elements. 


After my card was finished, I attached it to a test tube filled with candy bones.  The test tube is from Martha Stewart's Halloween line of products.  Sometimes the hardest part of a "test tube treat" is figuring out what to put inside.  So here's a list of candy and their accompanying creepy names:

Gummy worms: Medusa Hair
Good and Plenty's (white): Troll Teeth 
Mike and Ike's: Dragon Toes
Jelly beans: Lizard Larva
Certs (left in the cylinder packaging) or other mints: Vampire Repellent
Coconut M&M's (white): Spider Eggs
Cinnamon Red Hot's: Slug Hearts
Candy pebbles: Swamp Rocks
Licorice (black): Rat Tails

Thursday, October 25, 2012

Halloween DCWV Layouts


Just one week away! Are your costumes ready to go? I have 5 kids with big ideas but only a few of them actually have costumes that match their ideas. Halloween is a big scrapbooking holiday for me. I love archiving the costumes, the candy haul, the school parties, family parties and the pumpkins.
Heather from our Design Team has some darling Halloween layouts to share today. Check out DCWV Halloween paper pads as you get ready to create your layouts to remember Halloween 2012!

trick or treat cutie pie layout


smallest pirate layout

Thanks Heather!

Wednesday, October 24, 2012

Altered Halloween Project using DCWV

Hello there, it's Wendi and I am sooo excited to be on the new DT here.

I am a HUGE fan of Halloween, and it is our family's favorite holiday here at the house. We love to go to the pumpkin patch, corn mazes, dress up, and trick or treat. I also LOVE to decorate and make the house fun and spooky.

I decided to make a fun altered Halloween project, that would be perfect as a centerpiece on the table, up on the mantle or almost anywhere in the house. Another idea, would be to fill it with candy and give it to someone special.

For this project I used the DCWV Halloween & Fall stack, DCWV Halloween embellishment flip pack.
All I did was take a plastic box and then cover it with the spider web paper and fussy cut out the 31, the pumpkin and the Trick or Treat from various papers.

Next I made accordion "flowers" and circle punched out papers and distressed the edges. To make sure they stayed I hot glue-gunned them to a cardboard backing. You can cover it with paper so it matches. Then I rolled paper and made "stems" to hold the flowers to.
And your done.

So are you ready for Halloween? Do you have your costume all ready to go and trick or treat bags ready???

Visit DCWV for more ideas and to see all their great product!

Have a wonderful day... and Happy Halloween!!!!


Tuesday, October 23, 2012

Halloween Cards


Happy Tuesday! Check out these darling Halloween cards! I LOVE the seasonal colors! Thanks to Kassi from our Design Team for this “Scary” Card!

Scary card up close
Product used: DCWV Halloween & Fall stack, DCWV Halloween embellishment flip pack, white card stock base, gauze
Scary card
DCWV has some darling Halloween/Fall paper packs out right now! Don’t forget to pick up these packs, perfect for cards, layouts or whatever other projects you have going on this season.
Wendi's 2 cards
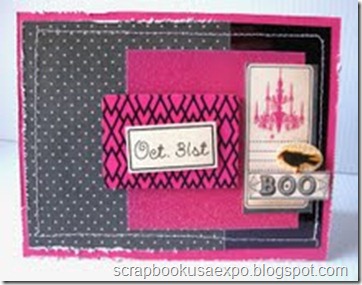
Wendi, from the Scrapbook USA Expo Design Team has put together a couple of fun cards. I love the “Boo” card using some of the “non-traditional” Halloween colors and still making it perfectly SPOOKY!
Wendi's card #1
Wendi's card #2

Pop on over to DCWV and lot's more fun ideas are waiting!

Monday, October 22, 2012

Our 2013 Design Team!

I am pleased to introduce the members of the Scrapbook USA Expo 2013 Design Team!

Andrea O
Ange W
Heather P
Jennifer D
Kassi H
Tomi Ann H
Wendi R

We are looking forward to many fun and inspiring products from these ladies! This was our very first design team call and the field of candidates was truly incredible!

Only about 10 days until Halloween. Enjoy a few fun projects submitted throuth our Design Team Call

Thursday, October 18, 2012

Bring on the CANDY!

Trick or Treat [infographic]
Via: DegreeSearch.org

Oh Yeah, I am part of the 90% who sneak from the kiddies. I won't lie. Since I am making confessions I will also admit I bought my Halloween candy the first of October and now I am going to have to re-buy. Argh, I have no self control.

Now that I have enjoyed this visual smorgasboard I better go make dinner!

Happy Halloween!

Wednesday, October 17, 2012

Care With Cards Fall Totals

The totals are in - We collected over 6200 cards at our Fall show alone! Absolutely AMAZING!! That brings us to over 9000 cards donated this year alone! We were able to contribute to Operation Write Home and The Huntsman Cancer Institute in 2012! Keep up the card making. We are working on a number of opportunities for 2013!

Kerri's Why I love you card

2 darling cards using “The Sweetest Thing” by My Mind’s Eye! Check their blog out for loads of card making ideas (ok, their blog fills all your paper crafting needs). Pick up some of their darling product as well because we only have 5 months to make over 6200 cards!

Kerri's Your the best card

Thursday, October 11, 2012

Is It Halloween Yet?

When I look at my garden, I know it is fall but when I walk outside it sure does not feel like it. It is an absolutely beautiful day in Utah today! My kids are on “fall break” so before their “break” starts we are doing a bit of fall cleaning and finishing up our fall and Halloween décor. I am excited to show it off next week but until then.

Check out a few of my favorite fall finds around the web today:

Aren’t these little spiders cute?? My kids would love seeing these hanging from our fruit bowl! Visit DCWV and follow their easy tutorial to make your own.

LOVE the fall colors, don’t you?? This darling layout would look great in a frame with other fall décor or as a card to send to Grandma. Super cute idea over at Imaginisce. Visit their blog for more fun ideas!

Lot’s of fun Halloween ideas over at My Mind’s Eye! Lot’s of ideas for great treat bags. My kids would love this spooky surprise in their school lunch!

Now is this an awesome banner or what? The ladies over at Graphic 45 always deliver! Lot’s of eye candy over on their blog right now! Check out their Halloween home décor for some darling fun.

Time to get my crew cleaning because I am excited to get some Halloween crafting done over here!

Have a great day!!

Monday, October 8, 2012

Scrapbook USA Expo Recap #2

How about last weekend’s shopping?? There were some fantastic new vendors at this show (wish I would have gotten photos) and there was some really great product at great prices
I am a shopper at heart but never really have the time to do the kind of shopping that I would love to do at the show. I did pick up a few goodies that I am really excited about. I have some fun Christmas present ideas in store so I will share my purchases later, once they are ready to be wrapped!
I do want to share a post from Natalie outlining her “finds” at the show. I was laughing while reading her post because I feel like a know the show inside and out but she found some goodies that I completely missed!
Natalie blogs at www.natalme.com. Hop on over and see how her shopping went at the show!

The Deal of the Hour produced a number of great price deals. Many of the companies took advantage of this opportunity to offer extra specials in addition to the already great prices they were offering.
DSC_0002
I got to Basic Grey on Friday morning just as their Hour long deal was beginning. They had great prices going on all show long!
DSC_0111
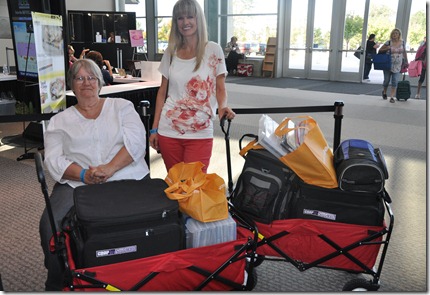
By Saturday morning I had pieced together a wildly popular new trend. I would say “out” with cropper hoppers and “in” with industrial wagons but cropper hoppers are in the industrial wagons! I wish I would have counted how many red wagons came through the show! There had to have been dozens if not over a hundred of these handy 4 legged friends! Costco and Sam’s Club really outta thank the Scrapper’s out there for buying these things up! If you are not a fan of red, no worries, I saw them in hunter green as well. These 2 lovely ladies above were in line to enter the show on Saturday morning when I caught them on camera. I wish I had a photo of them on their way out because I do not know where they put their purchases!
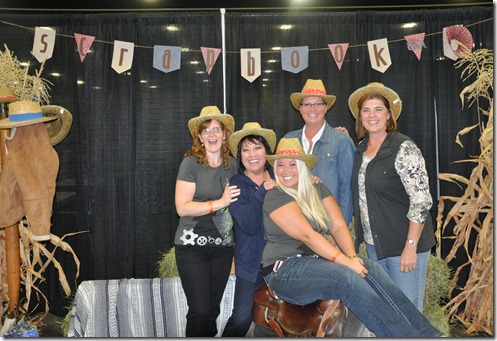
Now for this show’s “fashion”. The cowgirls were out in full force last weekend. I did see a group of ladies in matching cookie monster garb. I know there were a number of them but never saw them all together to get their photo. I did LOVE these new t-shirts (below) being fashioned by 2 of our VIP ladies. Super Cute!!
DSC_0061
If you have show photos I can share please send them to info@scrapbookusaexpo.com or if you have blogged about the show please let me know so I can link over to you!

Thursday, October 4, 2012

Scrapbook USA Re-Cap Part 1

What a great show this past weekend!

Our Cowgirl Theme with the VIP’s was great! Perfect for the beautiful fall weather we are enjoying! A really nice cowgirl even gave me her IBC just in time for a much needed sugar boost! We took some super cute photos of our VIP ladies. I will get those photos sent out to each of you before the week is over.

DSC_0064

DSC_0052

The VIP Layout Contest was CRAZY impressive! I know the judges both days had a really hard time picking 3 winners because all the entries were fantastic! We got a great group photos of all of Friday’s entrants plus the top 3. Somehow I missed getting photos of Saturday’s layouts and winners but they were equally as impressive. (If anyone has photos from Saturday please send them to us)

DSC_0086

DSC_0089

Starting at 6:30 on Friday night was The Young Scrapper’s Club. We rocked things until midnight on Friday night and it was the was the BEST YSC ever (IMO of course). Our young crafters enjoyed karaoke, nail painting, glitter tattoos, hair coloring, gift sack crafts and Duct tape purses. The purses were an over the top success. I thought I had brought plenty of supplies but we ended up making an emergency run to Walmart for more Duct tape. In the end there was plenty for the girls to make a purse (or 2 or 3) and in some cases their purses were more like travel bags, LOL! The girls had a great time picking their prints, mixing and matching and creating some darling purses. Because of the tender age of our youngsters I only have a few photos of girls whose mom’s gave approval for me to share.

DSC_0094DSC_0096

The Young Scrapper’s had their ears peeled and as soon as the main hall dance-off began a few of them headed out to join in.

Our Young Scrapper’s Club will be back in the spring. We are looking forward to more fun Friday nights with these sweet young crafters!

The recap continues tomorrow!

Tuesday, October 2, 2012

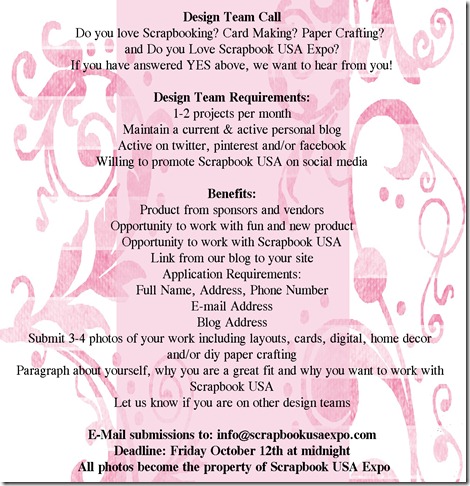
Design Team Call for Scrapbook USA!

I have now had almost 72 hours to rest and relax from such a fun and crazy weekend! Wow! What a fun weekend it was!! It was fantastic to meet up with some wonderful friends and to make some new connections! Thank YOU so much for coming out and spending the weekend with us!
I am excited to re-cap the weekend’s highlights all weeklong but first, I have some exciting news…..
Our little corner in cyberspace is growing! This is an OFFICIAL call for applications to participate on the Scrapbook USA Expo Design Team! I am so excited to grow our team! Good Luck!

Design Team Blog