Next Show: April 20th & 21st, 2018


Home i Event Info i Tickets i Classes i Vendors i FAQ's

Wednesday, September 11, 2013

"The Primrose" Stack from DCWV

Hello all!  Andrea here and I just MUST rave about The Primrose stack from DCWV!  It's one of my favorite lines they've done with its romantic pastels and soft images like birds, flowers and butterflies.  Here's a card I made using some of this fantastic paper:


I adore the ruler-edge bottom and the birdcage, postal stamp and flowers you can see in the background.  The girl stamp I used is from Julie Nutting's line through Prima.  I made the dress out of fabric scraps and added some Washi tape to the background for even more visual interest.  I also used chalks to color in the girl's skin and hair and rosy cheeks.


Lastly, I finished off the card with this great sentiment stamp from Unity Stamp Company ("She remained true to herself").  I love that saying because it reminds me to live up to whatever I hold most dear and to not waste energy trying to be someone else.

In addition to the fun patterned paper, this stack also has a lot of flags and frames that you can cut out for all sorts of projects.  The possibilities are endless and if there's one "must-have" paper pad from DCWV, The Primrose stack is it!

Tuesday, September 10, 2013

Birthday star…. (DCWV "Birthday Wishes Stack)

Hello my friends! 

Are you ready to celebrate?

This time of year, my family has a TON of birthdays.

And, as I am sure you all understand all too well, were there is a ton of birthdays, there is also a need for a TON of birthday cards!  

DCWV has the funnest birthday stack called "Birthday Wishes" that is full of bright colors, sparkle, and pure kid joy!

The card stock was so fun, that I hardly had to do anything!

I decide I wanted to try my hand at a spinner card, so I chose a label on my Silhouette Studio, and made a rounded rectangular slot. I then sandwiched a foam pop dot circle between 2 pennies and placed it in the track.

I cut out a star out of card stock, then the swirls out of double-sided adhesive. I then sprinkled glitter over it. I glued it over the penny.... When you tip the card gently to the side, the star spins across the card! 

 It makes me smile- of course, I'm easily entertained. LOL!

I think my niece will enjoy it though!

Enjoy!


Supplies Used:
Paper: DCWV "Birthday Wishes Stack", card stock
Ink: StazOn
Silhouette: Artisan Label Set, 3 Patterned Stars
Other: Glitter, foam dot, pennies

Friday, September 6, 2013

A girl should be…. (Fancy Pants "Trend Setter")

Hello my fabulously creative friends!

Have you seen Fancy Pants' Trend Setter line?

I'm totally in LOVE with it! 

I love the patterns... there is a great mix of chevrons, stripes, stars, dots, maps.. and the colors are gorgeous!

I used some ribbon to lace together "Style Sheet" (top paper), leaving a nice gap between the two pieces to show the criss crosses as well as the "Fashion" (pink map paper) that is behind the ribbon.  A nice little embellishment cluster under the bow and a sentiment sticker finish it off... It has a lot of texture and detail, yet it was actually really quick and easy to put together.


I love the coordinating embellies for the line... it makes things SO easy! 

The chipboard flower is from the Button set. I pulled off the foam pop dot so I could thread the ribbon through the button hole to secure it to my card. The stars come from the Sticker Fundamentals sheet. And last, but definitely not least, the quote is from the Label Stickers.

 I think the quote "a girl should be two things: classy and FABULOUS.  coco chanel" is absolutely awesome!  The perfect pick-me-up.

Enjoy!


Supplies Used:
Paper: Fancy Pants "Trend Setter", card stock
Ink: Distress ink
Embellishments: Fancy Pants "Trend Setter Label Stickers", "Trend Setter Sticker Fundamentals", "Trend Setter Button Set"
Other: ribbon, eyelets


Thursday, September 5, 2013

Sweet Little Treats - DCWV Summer Garden Stack

Summertime isn't quite over, still a few more reasons to celebrate!

And of course with celebrations, you need favors!


These SWEET little boxes were made using DCWV Summer Garden Stack! The bright designs are perfect for any summer celebration!

I found a free template for the box HERE

A little tweaking in Silhouette Designer Studio (ok, quite a bit of time there since I just got my Silhouette, and I am still trying to figure out my way around the program LOL!), a few folds, some glue and ribbon.... DONE!  

They were super fast to make and are super adorable! They will make great favors & decor! I can't wait for the party to get started!

Enjoy!
~Kassi

Supplies Used:
Paper: DCWV Summer Garden Stack
Ink: Colorbox, Mark-it
Stamps: Close to my Heart "Pair-a-Phrase"
Dies: SVGStore "Mini Goodie Box", Spellbinders "Labels 18"
Other: Imaginisce irocks, ribbon

Friday, July 5, 2013

DIY Washi Chalkboard Clothespins


Have you seen those cute little chalkboard clothespins around the web? There are a bunch of Etsy shops and boutique deal sites that have had them lately. And I came really close to buying some until I realized I had the stuff to make my own! And it's a little easier on the ole' budget too (more money for crafting-yea!).

These were super easy to do, easily personalized, and I'm thinking I'll be making these for all kinds of events in the future-baby showers, birthday parties, and even Young Women events. Here's what you need to make them. Two of the supplies I used came from my favorite daily deal site-Pick Your Plum! If you don't know who they are, you'll want to check them out. As sad as it is to admit, I check their website first thing when I get up in the mornings! Some of their really great deals go quick :)

DIY Easy Washi Chalkboard Clothespins
Wood Wafers (I got mine from The Wood Connection and I've seen them at hobby stores)
Washi Tape (From Pick Your Plum)
Chalkboard Vinyl(From Pick Your Plum)
Wood Clothespins (found in the Target dollar section)


The wood wafers are super thin and come in a variety of shapes. Mine are oval. They did come with small holes, for threading ribbon or twine through, but the hole was covered up by the Washi Tape. First, I traced the wafers on the back of the chalkboard vinyl. Then, I cut around the inside of the tracing, making the shape smaller (so the washi tape would show around the edge of the chalkboard vinyl). I found three of my favorite styles of Washi Tape and covered the wafers with a few rows of each, wrapping the tape around the wafer to secure.


Once that was done, I added the chalkboard vinyl.
 I then cured the chalkboard vinyl by using the side of a piece of chalk and dragging it across the vinyl. This prevents the vinyl from "ghosting" as much. Finally, I used wood glue to adhere the clothespins to the back. Don't ask my why, but I've found that wood glue adheres so much better than hot glue!


These are so cute and I can't wait to make some more in the future. Next time, I'm using squares with dry erase vinyl (also from Pick Your Plum!). 


Wednesday, July 3, 2013

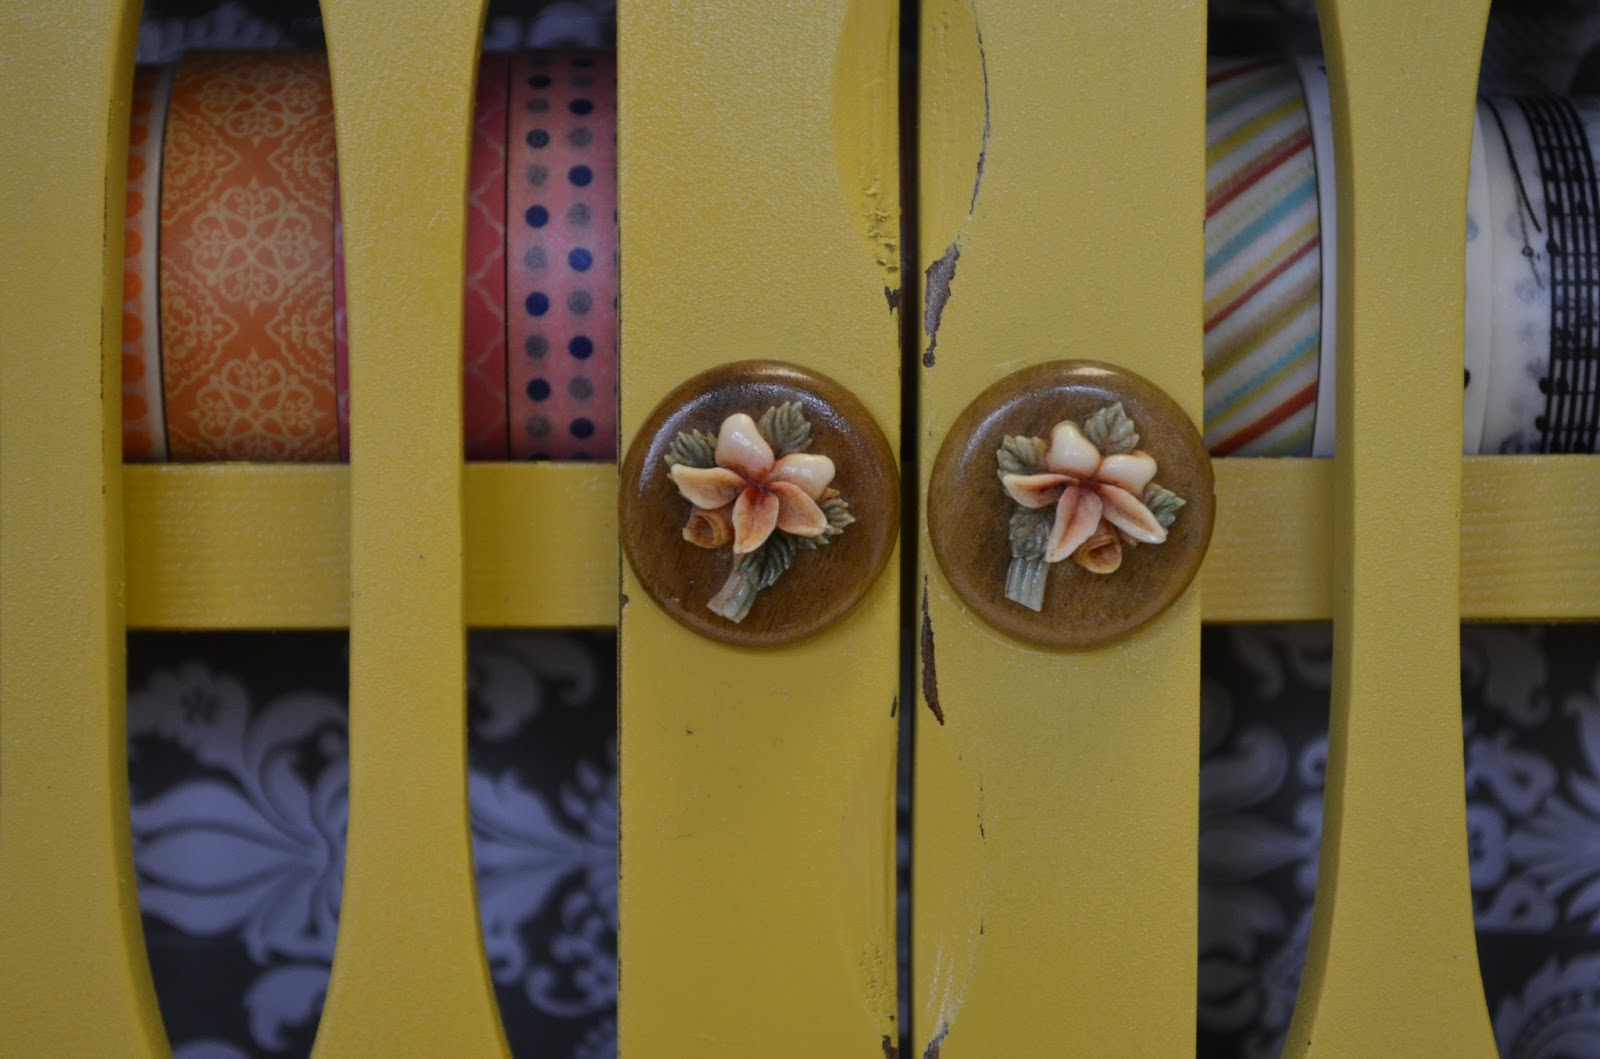
Washi Tape Cabinet Organizer


I seriously love finding old things at the DI. It's starting to become an obsession! A few weeks ago, I found this little old spice cabinet there. It was seriously falling apart and had an old, ugly wood finish to it. But, I knew I could give it a coat of paint and it would be perfect in my office/craft space for some of the little things I have laying around. 

All I needed to do was clean it up, get some new nails, and then give it a few good coats of spray paint. I love using Valspar Spray Paint because it has the paint and primer in one! The yellow works with the colors I am doing to makeover my room. 

Once it was painted and I had gone over it again with some sandpaper, to age it a little, I wanted to add some fun to the back of the cabinet. I found this beautiful duct tape by Die Cuts With A View. It has a ton of uses, including using it on furniture. Love!!!! This pattern is a gray damask and matched well. It was easy to measure, the back of the trim has a grid, and they went on easily. The trim is also removable if I ever change my mind about it. 


For the knobs, which were missing when I picked this up, I used some of my Grandma's old costume jewelry. I found this pair of wooden earrings. It makes this project even more meaningful to use something of hers. 

Then, it was time to add my washi tape and glitter. The little shelves hold the Washi Tape perfectly and the little bottles of glitter. Now, I don't have to worry about losing them! And maybe it will keep me from buying more!


Monday, July 1, 2013

Mustache Frame


About a month and a half ago, I snagged some great bare wooden frames from Pick Your Plum at a steal! Since then, I've been trying to decided what I wanted to do with them. The shapes are so cute but do I paint them one color or try something more fun? For one of them, I decided to try something fun and as a gift for Father's Day. I have loved the mustache trend, especially because I have two little guys myself.

It was super simple. I painted the edges orange and then painted the frame cream, being sure to be careful around the edges. Next, I had to make a stencil with mustaches.

The stencil was pretty easy to do with my Silhouette machine. I purchased a mustache shape from their online store, sized it down to the size I wanted and then repeated it. I used the grid in my program to space them out the best that I could. I cut the stencil out on vinyl. I used brown paint to fill in the mustaches, let it dry, and then peeled off the vinyl. And voila! A cute, easy frame to show off our little boys.