Next Show: April 20th & 21st, 2018


Home i Event Info i Tickets i Classes i Vendors i FAQ's

Friday, November 29, 2013

Time to "Recharge"

 Hello! Today I have a layout using The Sky's the Limit stack from DCWV. There are so many beautiful papers in this stack and so many different uses for it. 
For today's layout I picked a photo of my son taking a much needed nap in December of last year. 


The holidays can be so busy and hectic that we all need a nap now and then just to keep going. Anyone who's been around a toddler for even 5 seconds knows that a nap is just a battery recharge for them. lol My son is no exception. He's a bit like the energizer bunny. So I cherish every little sleepy moment he has.


I picked 3 different patterns from the stack that all had a night time/star theme. I used this pretty starred and doodled one for my background and then cut the other two into smaller sections for layering under my photo.


I used border punches and a corner rounder to add a little more detail and really enjoyed sprucing up these yellow stars and lights with my yellow stickles. For a bit more embellishment I added glossy accents to the moon and then remembered I had these fun bubble stickers with "sleepy" sayings and put a few of them on the layout.

 Here I layered some triangles, cut from a cloud paper I used on another project, to bring attention to the title. I didn't feel the need to do a lot of journaling for this photo. I think this sleepy little head says is all.

I hope you have a fun and crafty day! Don't forget to slow down and recharge your batteries now and then. :)Ange

Wednesday, November 27, 2013

Nuts About You!

 Hi! Ange here today with a couple of fun cards.
I used Moxxie's Forever Fall line & DCWV's Pebbled stack for these cute cards.


On this first one I picked my base (brown DCWV cs), added some sanded Pebbled cs from DCWV, which I think really spruced up the front of this card! I love all the texture it adds. Then I used some scraps of Foilage along the bottom and fussy cut the cute leaves from Unbe-leaf-able & Fall cards for my leaf pile. I used the My Dear Friend rub-on and this adorable little deer sticker. I love this little deer, I've been waiting for the perfect place to use him.


This card is a birthday card for my daughter. I love this Nuts About You! sticker and thought it would be perfect for this card. The yellow polka dotted paper is the backside of Fall cards, the additional stickers are off of the Alpha sticker sheet and the white cs is from the Pebbled DCWV stack, as is the brown cs base.
I added a couple more stickers with a birthday sentiment inside.

These cards were fun and easy to make using Moxxie's awesome cardstock stickers and this super fun Pebbled stack from DCWV.
:)Ange

Supplies:
DCWV - cs Pebbled stack and brown bases, brad
Moxxie - pp, cs stickers, rub-on, alpha cs stickers Forever Fall
ranger - brown ink
colorbox - black ink
tombow - tape runner
stash - emery board

Tuesday, November 26, 2013

Give Thanks


I have been loving the variety of burlap that has popped up everywhere-ribbon, colors, patterns, so many possibilities! It's so much fun. And the perfect match for fall. 

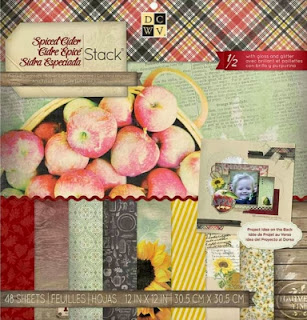
Die Cuts With A View is known for their gorgeous papers and their Spiced Cider Stack did not disappoint! Plus, they now have a burlap 6x6" paper stack that I have fallen in love with. The two stacks were a match made in heaven. I made several things with them, and this is the first project. 

Because the burlap paper is so easy to work with, I knew I'd be able to pull of making some medallions with both paper stacks. I made two different sizes. Here are the supplies needed.

Supplies
DCWV Spiced Cider Stack
DCWV Burlap Stack
Hot Glue (Lots!)
wooden dowels
vase & shred
Scoring Tool (I have a Martha Stewart one)

They were all made the same way. Here's how to do it! The Burlap took some extra patience because it's pretty thick but it worked well. I used my scoring tool to score one 6x6" piece from the pad every 1/2". Once 6" sheet makes half of the medallion. To make it into a fan, fold along the score lines and then pinch it in the middle. Bring the two middle sides from the pinched point up together and secure with hot glue (this will leave one side flat). Do the same thing with the other side and then hot glue the two of them together along the flat one sides of each half. For one of the medallions, I scored 1/2" along some patterned 6x6" paper and then created a "bow", securing with hot glue as well. The middle was covered up by a graphic from of the of the papers in the Spiced Cider Stack. 

For the metallic medallion, I used the same method as the burlap, except I scored it horizontally and vertically to give it some extra texture.

For the larger medallion, I used the 12x12 papers with two different patterns. It's also the same method (score every 1/2" and then pinch them together and secure). The graphics all came from the same paper in the stack. They were all so cute, I had to use them. 

To finish them off, I used some wooden dowels and hot glued them. I inserted them in some floral foam in a vase I covered with some burlap twine. 

They turned out so cute, I can't wait to do something similar for Christmas. 


I also made a fun little block withe the another medallion. I painted an 8x8" wooden block, modged podged some paper from the Spiced Cider Stack (that I cut down), and then adhered a burlap medallion on it. Another fun way to use the burlap paper!


Hangin Out!

 Hello! I have a crazy fun layout for you today. 
I love hanging out with my crazy kids and their friends. There's always something exciting bound to happen and this outing was no exception. Last year a small group of us went to a local pumpkin festival and I got this series of funny photos.


I loved each photo in the series and wanted to let the photos tell the story. The Homeroom stack from DCWV was the perfect line for this. Besides the fact that the photos center around a school bus, I just loved the pattern paper from the stack that has all of these fun word bubbles on it.


 I started with a kraft base and added drips of mist in bright colors. It's really easy, just take the lid off, unscrew the top, hold it over your paper and press the top like you would to mist, but then it splatters out the tube at the bottom. The more ink in the tube the bigger the splatter.


I matted my series of photos on one pattern of paper and then chose another pattern for the main photo at the bottom. Then I picked out the banners and title and cut them from another paper in the stack.


They have an entire sheet of word bubbles in this stack! Some are blank and some have cute sayings already. I used a lot on this layout and I think it really added to the layout and the "school" theme. I finished up by inking all my edges with black, including my photos. Which I sanded a bit first so the ink would stay in place.

Happy Scrapping! :)Ange

Supplies:
DCWV - Homeroom stack
ranger - mists
colorbox - black ink
paper studio - kraft
my little shoebox - mini alphas
tombow - tape runner
ek success - foam adhesive
zig - black pen
stash - emery board

Monday, November 25, 2013

Thank You, Echo Park

Hello my wonderful friend!

Sometimes you just need a quick card, right? (but it you don't want it to LOOK like you threw it together!)  Well, it doesn't get too much better than this... thank you Echo Park! 

Both the turquoise chevrons and the owl papers are journaling cards from Echo Park's "Oh So Thankful" Photo Freedom kit. I trimmed the owl card down about a half inch more than the chevrons so there would be a border, then I ran a distressing tool over the edges. The "thank you" was spelled out using the letter stickers also found in the kit. A little ink around the edges and a jute bow, and it is ready to go! WHEW! 

Now back to your busy life.

Enjoy!

Products Used:
Paper: Echo Park "Oh So Thankful" photo freedom kit
Ink: Distress
Other: Jute


Thursday, November 21, 2013

Photo Freedom by Echo Park

Hello my wonderful friends! 

Raise your hand if you are behind in your scrapbooking.

Yeah... me too. 

(you can all put your hands down now.)

Echo Park has a fun and super easy way getting a hold on those photos. It's called Photo Freedom, and you can check it out HERE. Their focus is really about keeping it simple and getting the photos and stories recorded. However, that doesn't mean it has to be style has to be sacrificed! Their papers and embellishments are adorable!

I was sent one of their "Oh So Thankful" kits to work with...

My page came together so quickly! I was amazed! 

Tucked behind the photo is a hidden journalling tag. The kit comes with some super cute double sided journalling cards, all I had to do was add a tab on the edge so it is easy to pull out.

I made a few border strips as well as a the quote tag with some stamps from my stash. I love being able to mix in stuff I already have with current kits on the market!

Here's a quick tip for you...

When using stickers to make titles, I like to use a section of the sticker backing paper to figure out the spacing. By putting a ruler underneath, you can get your letters straight and evenly spaced (you can often see through the backing papers enough to see the ruler lines). Be sure to leave the stickers hanging off the edge of the paper for easy transfer...

To move them to your project, simply place them where you want them, firmly rub the stickers on your project where they are hanging off the backing, slide the backing sheet out and rub on the other half. Easy titles! LOVE!

Enjoy!

Supplies Used:
Paper: Echo Park "Oh So Thankful" photo freedom kit
Ink: Memento, Archival, Distress
Stamps: Unity "Tribal Trend", "Jumprope", "Strength and Dignity"
Dies: Spellbinders "Labels 18"
Other: tissue paper, glitter, pearls

Tuesday, November 19, 2013

I H.E.A.R.T. Mat Stacks

Hello and good morning..

It's Wendi here sharing a page with you using a DCWV Mat Stack. I LOVE Mat Stacks just for the fact that you get such a great variety of papers that all coordinate in one place, so you can just start a layout and go!!!! I LOVE that!!! It makes my scrapping life sooo much easier.

Here is a layout of my little one. She LOVES to line up all her toys in whatever rooms she wants to play in. It happens to be that she brought them all into the kitchen at this time, so I took a photo. Some of these cute things little ones do, only last for so long, and then they out grow them.

I used the Dots Mat Stack, which is a 4.5 x 6.5 paper stack, so I actually cut out several circles and added them to my page for a playful look.

I also added 3 colors of misting in the background and some bolder red papers and cut them into pennants under the photo:

I also added a fun envelope to the page to mix it up a bit:


So there you go!!! An easy page to make with smaller sized papers. Make sure to check out the DCWV site for their cool products.

Thanks so much for stopping by and have a great day!!!!

Friday, November 15, 2013

Fall=Apple Cider

Hello! It’s Heather again and I am back with a fun card I created using the beautiful DCWV Spiced Cider Stack. This stack is perfect for all kinds of Thanksgiving themed projects. The paper has a beautiful glossy texture and some fun cooking related images. Here is my card:


This card actually came together very quickly, and I love how it turned out. I started with a red leaf patterned background, and added a yellow polka dot patterned paper as a layer. It doesn't come through very well in the photo, but the yellow dots have a little bit of a glitter-y sheen. I added some pretty yellow ribbon along the bottom. I then cut out the tag, fence-style sign and the leaf. I added some baker's twine to the hole of the tag, offset the sign so it falls a little off the card and popped up the leaf on foam dots for dimension. Here is a closer look of the leaf:

Thanks for looking at my project! Be sure and check out the DCWV Spiced Cider stack for your own Thanksgiving cards and projects.

Thursday, November 14, 2013

Paper Pumpkin Table Decor

Hi I have a fun and super quick project to share with you today. The holidays are sneaking up on us quickly and these adorable little pumpkins are the perfect center piece for you Thanksgiving spread.


I've seen a few different ideas for these around the internet, but they are super easy to make and change to suit your purpose.
For the larger pumpkin I cut 2 12x12 papers into strips about 9x7/8 inch, inked them and then, with the papers stacked, put a brad through each end (I used a whole punch to make it easier), fan them around until you have your pumpkin. Then cut some scraps into super thin pieces, curl them up and add them for "vines" and a wider scrap rolled for the "stem". You could also add leaves and/or tags or whatever makes you smile. The bigger your pumpkin the more strips needed to make it full, I probably used around 20 strips for the larger pumpkin. 

For the smaller pumpkins; I used 14 strips 6.5x7/8 for the medium one and around 12 strips 5.5x7/8 for the smallest one. Here's a closeup for you:


  My 4yr old son kept asking me if there was candy inside. Not a bad idea! 
I plan to let these decorate my table all month, so maybe I will hide a little treat in there at some point.

Happy Fall Y'all! :)Ange

Supplies:
Ranger - vintage distress ink (I bought this at the last Expo)
Glue dots in small and medium (also available at the Expo)

Wednesday, November 13, 2013

Thankful For You!

Hello, Heather here! I was asked to create a Thanksgiving themed project with some awesome product from DCWV.  I decided to do a slightly untraditional layout with the theme of thankfulness by paying tribute to someone in my life that I am very thankful for! DCWV has some amazing new product that is so fun to play with, and adds some beautiful texture and interest to your pages. One of which is the Fiber Natural stack and then the Burlap Paper stack. Both come in 6x6 pads, and the possibilities of how you can utilize them are endless! I especially loved playing with these textures for a fall-themed page. I love the texture it created on my page and how it really complemented the fall- themed paper.
 

Here is the layout I created using DCWV The Wild Splendor stack (Last year's fall themed stack):
I love the fall colors in non-traditional patterns. I have always liked ruler patterns, and of course chevron!
I adore these leaves. The glitter-y maple leaf was fussy cut from one of the papers in the stack, but the other leaf I made using the Fiber Naturals paper. I traced a leaf pattern and then used Distress ink. I used an ink dauber for part of it, then ran the leaf directly over the ink pad for the darker spots. The texture in the paper picked up the ink so well and gave it a very realistic looking color pattern. It was really fun to play with this and I love how it turned out.
Here is a close up of the burlap paper. It is basically like burlap fabric with a paper backing. There are so many fun things that you could do with this paper, and I absolutely love it for fall projects. I used it in this layout to just add a little extra texture and interest. I cut the title from my Cricut using the Thanksgiving cartridge, and then added some Thickers in a burlap color/pattern.
Lastly, I fussy-cut some chevron shapes from one of the papers in the pad and popped them up on foam dots for some dimension.
Thanks for looking at my project today, and be sure to check out the awesome new stacks from DCWV- I think you will have a blast finding creative uses for these textured papers!


Tuesday, November 12, 2013

Fall Colors

Hello and good morning...

It's Wendi here and sharing a layout with a totally perfect fall line of paper. The collection is the DCWV Modern Meadow collection and it's gorgeous. Some of the papers have a bit of sparkle on them, along with some yellow, brown and orange hues, perfect for autumn and fall scrapbooking and card making.

Here is my layout, even though it's not a fall photo, here in California we don't get a whole lot of fall colors in our leaves, something that I really miss from living in Utah....
I fussy cut out the title work from one of the tag cards. Don't ya love the cute owl?
And added another quote card for the page:
I added some machine sewing around the border to pull the page together and some enamel dots splatted through out the page:
Thanks so much for stopping by... Have a great day...

Other Materials: MME enamel dots, Chic Tags journal spot, Machine sewing, Sharpie pen
Used: November DCWV sketch

Monday, November 11, 2013

Halloween Layout

Hello and good morning

Its Wendi here and I'm sharing a layout with you about one of my favorite holidays.... Halloween!!! I love dressing up, having spooky decor around the house, and all the fun fall activities that go along with it. This photo is from this year's Halloween of my kids dressed up in their costumes. I used the DCWV "Spooky Time" 6x6 papers for my page. And just because you have a 6x6 pad, doesn't mean you can't use the papers for a 12x12 page.

I cut over several of the fun wording squares and added them as embellishments on my page:
I just LOVED this fun scene on the one paper, that I decided to use it all on the layout:
And then added some of the yellow "Natural Fibers" papers for some texture:
Thanks so much for stopping by and have a great day.

Other materials: MME enamel dots, Mister Huey mist, Sharpie pen, Machine Sewing.

Saturday, November 9, 2013

Summer Memories

Hello and good morning...

It's Wendi here and even though it is fall, I am finishing up a few final summer layouts that I created with the Imaginisce Childhood Memories collection. This line is really super playful and has some fun colors to produce bright, happy pages. Each time I use this line, it puts a smile on my face.

I scrapped a photo of my daughter from swim lessons this past summer. She really worked hard and came a long way in her swimming abilities and I was proud of her.

I just adore the fun polariods and pictures from the Snapshots paper, it's such a fun additive.

 I layered several paper strips and then added some paper pleating and machine stitching over it:

I added blue misting to the page, since it's a water/pool page, and then topped it off with some pennants on the side with stitching:


Make sure to stop by the Imaginisce site and see what fun collections they have!!!!
Have a great day.