Next Show: April 20th & 21st, 2018


Home i Event Info i Tickets i Classes i Vendors i FAQ's

Friday, November 30, 2012

Countdown To Christmas

There must be dozens if not hundreds (or maybe thousands) of ways to count down the month of December to Christmas Day.

Our family has had the same countdown tradition now for a number of years and each year my kiddos look forward to what little surprise is behind each little number.

It must have been 4 or 5 years ago that I made this with a few friends and I still love it. I like that it can grow with my family and I can change it to meet our needs as my kids get older.

DSC_0178

Since December starts tomorrow I need to get my slips of paper ready and get them hidden behind each day of the month. I include things like singing Christmas carols, reading a scripture verse, reading a favorite Christmas book and I do a few biggies like “hop in the car, we are going out for hot chocolate and donuts” or “get your warm clothes on, we are going out to see the Christmas lights”.

I always keep a master sheet of what each day is so if we change our plans I can discreetly make changes so the days work out.

DSC_0179

Back when I made this I could not find magnet sheets to back each square so I pieced together smaller magnet pieces. I just bought some Silhouette magnet 8.5X11 sheets from Make It Scrappin that would be perfect for this project.

No matter how you count down the days of December, enjoy each and every one of them! Merry Christmas and Happy Holidays!

Thursday, November 29, 2012

Masculine Holiday Card with DCWV

Hello my wonderfully fabulous friends!

It is almost December which brings me not only the need for Holiday cards, but birthday cards as well.  One of the cards I need is for a guy. I don't know about you, but I struggle with guy cards. I keep wanting to grab some flowers or rhinestones... 

However, the DCWV "Traditional Holiday" has some great papers that can be used for those masculine cards. 

I adore this plaid! It has just a touch of the gold foil running through it to give it pop without overwhelming everything.  And being printed on kraft paper? Yeah, I'm loving it!

The inside of the card has a built in pocket that is perfect for slipping in a gift card. These papers really made this card quick and quite painless. 

Enjoy!
~Kassi

Supplies Used:
Paper: DCWV "Traditional Holiday" stack, kraft
Ink: Distress Ink
Stamps: Heartfelt Creations "Small Cardinal"
Dies: Quickutz "Nesting Circles"
Other: nailheads

Wednesday, November 28, 2012

Basic Grey Christmas Layout

Basic Grey sent me the most gorgeous box of goodies for my ScrapbookUSA Expo projects this month.  It was like having my own little early Christmas!  They sent me the "Aspen Frost" Christmas/winter collection, and I had a grand old time scrapping with it.  Here's my first layout:


As I looked through my pictures from this past Christmas, I had a lot of little moments but no great "this is Christmas" shots.  Then I realized -- all the little moments are what make up a wonderful Christmas!  And the Aspen Frost collection was perfect for that theme -- I was able to use the patterned paper, letter stickers, tags, pre-sewn pennant flags (how cool is that?), and mini-envelopes to put together a fun, eclectic layout highlighting all the little "bits" we enjoyed so much.


Basic Grey is definitely a favorite booth at the ScrapbookUSA Expo.  They sell their big collection packs, card kits, and tons of little bits and bobs that you don't often see, all for great prices.  (Psst -- they've always had a one-hour sale on their collection packs during the day on Friday that makes them only $5 each.  DEAL!)  I may or may not have bought at least 10 different packs in September... and a ton of adorable flower clips... and labels and rub-ons and alphabet flashcards and more.  Oh, the awesomeness.

Thanks for stopping by!

PS I also used red velvet chipboard letters from My Mind's Eye for the title.

Tuesday, November 27, 2012

DCWV Pop-Up Card

Hello my crafty friends!

I was asked to be a guest teacher for a local scout troop. I was only in scouts for a few weeks when I was younger, so I'm not too sure what to expect. However, I know at least half of the girls, so it should be fun.

As part of their project, I want to teach them how to make simple pop-up cards.

Here is the sample I'm going to take...
I used the DCWV "Crafty Christmas" stack. I love that it is printed on kraft paper!!! It is such a fun twist on the traditional printed card stock!

I dyed crinkle ribbon using Distress Ink to match the red of the card.  I also attached a little type charm to the bow using a safety pin. I love the little bit of movement it adds to the card.

And for the inside, I cut out some of the images from other papers in that stack. 

I love the dimension the pop up gives it!

Hopefully the girls will like learning the pop-up cards... I know I think they are fun!

Enjoy!

Supplies Used:
Paper: DCWV "Crafty Christmas" stack
Ink: Distress ink
Stamps: Basic Grey "Winterland", Autumn Leaves "Messy Dates"
Dies: Quickutz "Nesting Circles", Spellbinders "Labels 18"
Other: Tim Holtz type charm, jump ring, safety pin, crinkle ribbon

Monday, November 26, 2012

Monogrammed Wall Hanging

Monthly Monday Challenge HERE


I hope everyone had a wonderful Thanksgiving and a fun weekend spending time with loved ones! With the Turkey and Pie behind us, it is time to look forward to the Christmas Gift Giving Season!

Looking for an inexpensive, yet cute, crafty gift to give this Christmas?

I LOVE the personal touch you can give with a monogrammed wall hanging. I actually made this a few weeks ago as a bridal shower gift but it would also make a fantastic Christmas gift, especially for that loved one who already has everything.

DSC_0048

I purchased the frame at Hobby Lobby. It was 50% off so I paid $10.00 for it. You could save some cash by purchasing a less expensive frame or by purchasing an unfinished frame and painting it yourself. I used some paper from home and some vinyl I got at our fall show in September for $1.00 per sheet (scratch and dent section in the Oh My Crafts booth). Looking at my line up of Christmas gift ideas, I should have gotten more.

This project did not make a huge mess and was super quick and easy to put together!

DSC_0049

Happy Crafting!

Wednesday, November 21, 2012

Fall "Thank You" Card

Monthly Monday Challenge #1 HERE
Hello everyone!
Happy Thanksgiving!

You know, one of the things I love most about fall is the colors!  The reds, oranges, and golds all blending in with the fading greens. Beautiful!


This card captures some of my favorite fall colors!  I used the DCWV "Fall and Halloween" paper stack as well as the DCWV "Autumn Melody" embellishment flip pack for the main elements of the card. It made it quick and easy to mix and match while keeping in the same color families! 


I added my own crinkle ribbon. I think it added a pop of bright color that really sets off the embellishment cluster well.

Under the embellishment cluster, I used bubble wrap and acrylic paint to stamp a texture onto the subtly printed paper. I love the effect!  

Enjoy!
~Kassi

Supplies Used:
Paper: DCWV "Fall and Halloween" paper stack, kraft
Ink: Distress Ink, VersaMagic
Stamps: Fancy Pants "On a Whimsy"
Other: DCWV "Autumn Melody" embellishment flip pack


Tuesday, November 20, 2012

Gratitude Garland

Monthly Monday Challenge #1 HERE

Andrea here!  We are now fully entrenched in my favorite time of the year!  The highlights?  Being able to drink hot chocolate without looking like a weirdo (I down the stuff ALL YEAR, which draws some looks in mid-July), wearing power boots and snuggly sweaters, seeing the changing leaves, getting giddy about Santy Claus's impending visit, spending time with family and friends, eating yummy food (thanks, mom!) and reflecting on our many blessings.  What's not to love about Fall?

To get myself into thankful mode, I put together this Gratitude Garland:


Since the holiday season can get a tad busier than I'd like (we all know THAT feeling), I wanted to make something that was fast and easy, but still meaningful.  I decided to make paper leaves listing some of my greatest joys and blessings and I attached them to a store-bought garland.  And if you want to go even lower stress, just stamp words on store-bought leaves!  It doesn't get any more time-saving than that!


The paper I used to make these leaves is from the "Autumn Melody" collection by DCWV.  I cut out some leaf shapes using the Cricut "Accent Essentials" cartridge, then stamped something I was grateful for on each leaf using alphabet stamps.  I inked and distressed the edges of the leaves and crinkled them and folded them to give them some added dimension.  Then I glued them to the garland and put the pumpkin in the middle.


This project is low-stress and is a great visual reminder to slow down and cherish what's truly important.  It would also be fun to do as a family activity with each family member writing down some things they're grateful for on the leaves.


So whether you use this garland as a circular centerpiece, or weave it in between some Fall-colored candles, you can bet that it will not only look good, but it will also be a good reminder of all the things there are to be grateful for!

Monday, November 19, 2012

Fall Layout

Monthly Monday Challenge #1 Here

Hello! It's Heather here with a fun fall project for you. Today I have a layout to share, using the awesome DCWV Halloween and Fall stack. I have loved working with this stack- I love that it has both Fall AND Halloween, so you can do all of your Autumn projects with one stack! Here is my layout:


For the background paper- I loved this subtle patterned paper, but thought it was just a little too think too hold up all my layers, photos and embellishments on its own, so I just glued it to a heavier piece of kraft cardstock.


DCWV also has some great matching stickers and other embellishments that matched perfectly with these papers. I also created some of my own. For these fall leaves, I cut the shapes on my cricut on Kraft cardstock and then used Copic markers to color them in. I tried not to be even with the coloring so you could see some darker and lighter areas like you would on a real leaf. I popped one up on a foam dot to give some added dimension.

I cut the title using some paper from the stack, and some matching cardstock. I added some additional kraft leaves popped up on foam as well.

I hope you enjoyed my project today! Be sure to stop by my blog for some additional details! Thanks for stopping by!

Friday, November 16, 2012

Kitty Notes Layout

Monthly Monday Challange #1 Here

Hello my wonderful friends!  

I am so thankful for the little moments in life that just make me laugh whether it is the silly things the kids say, the dog singing opera (don't ask), or the cat playing the piano... (and looking so cute!!!)


Isn't this a lovely color combo?  All three papers came out of the DCWV "Fall and Halloween" paper pack.  I love these!  They aren't the traditional colors I think of for fall, but they really work! 


Stamping on dark patterned paper can be hard... I use acrylic paint. It shows up really well!  


A little tattering of the photograph as well as machine stitching softens the edges to match the softer colors and feel of this LO.


Crinkle ribbon bows are so fun! I love how vintage-y and shabby they are!  For a quick accent, I used one of the epoxy flower stickers from the DCWV "Autumn Melody" embellishment flip pack. It matches the background paper beautifully! Love that!

Enjoy!
~Kassi

Supplies Used
Paper: DCWV "Fall and Halloween" paper stack
Ink: Distress Ink
Stamps: Sassafras Lass "Collage Trim", Fancy Pants "Doodles & Things" & "From the Garden"
Dies: Spellbinders "Labels 18"
Other: DCWV "Autumn Melody" embellishment flip pack, crinkle ribbon

Thursday, November 15, 2012

Thanksgiving Card

Monthly Monday Challenge #1 Here

November, with so much gratitude in the air, is a great time to catch up on all those thank you's you owe to the people who have lent a hand throughout the year. I created this warm and cozy thank you card with the lovely Autumn Melody stack from DCWV, one of the big sponsors for ScrapbookUSA Expo. If you've ever been to the Expo before, you know their booth is the one to hit early -- they have crazy deals on all their great paper and a ton of cute home decor.


I used a stamp set from Close to My Heart for the sentiment, embossing the leaves in gold.

Wednesday, November 14, 2012

Placemat Book Cover

Monthly Monday Challenge #1 Go Here
 
Hello my wonderfully fabulous friends!
When I was in high school, we were required to have covers on all of our text books to help protect them.  Back then, the store bought fabric covers were fairly new, and not too popular. Instead, we made them out of paper grocery bags. I loved this!!! Not only was it simple and free, I could doodle on it all I wanted during class when I got bored. =)
Fast forward to today.... I got a great deal on composition notebooks back when school sales were starting.  I love them!  However, the covers leaves something to be desired...
 
book cover 1

DCWV to the rescue!!! They have these great Paper Placemat stacks that are 12 x 18 in.   They are the PERFECT size for making adorable custom notebook covers!
The one I used for the main cover was plain dark brown in the center, but I really liked the border... I decided it needed a little something more... So, I cut out the center medallion of another placemat and glued it on... I added some color and shimmer by using Creative Inspirations paint.  I then accented the center with a epoxy sticker from DCWV's "Autumn Melody" embellishment flip pack.  The very edges of the medallion aren't glued on well... as the note book gets used, they will tatter... I love that! It shows how well loved it is. =)
 

book cover 2
 
I could have gone fancier with my decorations, but I wanted to keep it fairly smooth so I can write on the backs of the pages without any bumps. 
 
book cover 3
 
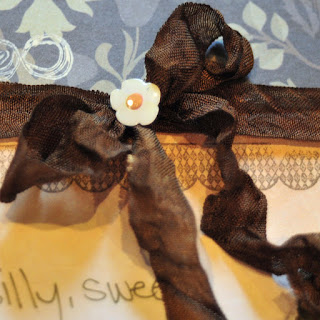
A little crinkle ribbon allows me to tie it shut to keep all my thoughts safe inside. 
 
Enjoy!
~Kassi
 
Supplies Used:
Paper: DCWV "Autumn Inspirations Paper Placemats"
Creative Inspirations Paint: Rose Quartz
Other: DCWV "Autumn Melody" Embellishment flip pack, crinkle ribbon, composition notebook


Tuesday, November 13, 2012

Paper Pinecone Tutorial

Monthly Monday Challenge #1 Here

Hey there loyal readers!  It's Andrea here with a technique to make paper pine cones using a 3D flower die.  How did this all come about?  I went on a walk yesterday afternoon, saw a cute little pine cone in my path and started thinking about how I could make a dimensional pine cone out of paper to adorn either Fall or Christmas gifts.  I know of at least one very cool die out there that already makes 3D pine cones (thank you, Tim Holtz!), but I didn't have one.  What I did have was a 3D flower die from Sizzix.  So here's how I turned a 3D flower into the pine cone you see on this embellished tin:


Start by cutting out two identical 3D flower spirals from the die of your choice (Sizzix, Lifestyle Crafts, Cricut and Spellbinders all have these spiral-flower designs).


I used DCWV paper because it's sturdy and both sides are colored so you don't have to worry about a back and front.  Next, roll the flowers into their 3D shape, starting from the outside in.  Remember my earlier tip about using a quilling tool to do this!  It makes life so much easier!


You now have two spiral flowers rolled.  You are going to stick these together to form your pine cone.


Because you're going to stick one flower into the other, cut out the center of one of the flowers so that you'll have room to insert the other flower into it.  The one that you cut will form the top of your pine cone.


Use hot glue or the adhesive of your choice to glue the two flowers together.


Once they're glued together, use needle-nose pliers to pull and elongate the bottom flower into a more narrow pine cone shape. 


Wah-la!  The last thing I did was to rub black ink across the pine cone (especially the edges) to give it a little more distinction and to blot out the white core of the paper.


So there you have it!  An adorable pine cone just ready and waiting to be put on the perfect gift!  For my little tin, I used paper from My Mind's Eye as the background and used fabric, tulle and lace to add accents at the top of the pine cone.  I used alphabet stamps for the sentiment.

The great thing about pine cones is their versatility.  You could add glitter to make it more festive or "frost" the edges with white for a winter look. 

Thanks for stopping by and don't forget to check out my my blog for more holiday fun this season!

Monday, November 12, 2012

Monthly Monday Challenge #1

Hello and good morning...

I am soooo excited to share that we are going to start something called the Monday Monthly Challenge here at the Scrapbook USA Expo blog... Each month,you will be given a challenge, whether a themed challenge, a sketch, color challenge, anything can happen here, and you will have the whole month to play along with, and be eligible to win a wonderful prize. You will have till the end of the month, at midnight MST to upload your project, page, card, etc to the challenge post and be entered to go into the drawing for a prize.

Let's get started for this months challenge, since it's the month of giving thanks, you challenge for November it so create something regarding the word THANKFUL... You can create a layout, a card, an altered project, or even a mini album, it's up to you.

For my example, I created a page with the title being Thankful for my Family.. now lately, family photos, that we are all in, are pretty hard to come by, so the best one I have is us at Halloween....

I used the DCWV Autumn Melody Cardstock mat stack and embellishments.
I used the metallic paper and used an embossed border punch to really make it stand out on the page.

So what are you thankful for??? What kind of project will you come up with.

So:
Create a NEWLY created layout, card,  or project with the theme of THANKFUL for this challenge. (no previously made projects or enteries will be accepted)
If you have a blog ADD your project to this blog post using the link below, NO LATER than November 30th, midnight MST. If you do not have a blog please e-mail a photo of your project to info@scrapbookusaexpo.com and we will add your project here.

A random winner will receive a prize from the entries for this contest. This month our prize will be a card kit giveaway sponsored by Basic Grey!! Product will include their brand new Aspen Frost, Kissing Booth and Little Black Dress!!!!

We hope that you will play along!!!! We can't wait to see it!!!!!


Friday, November 9, 2012

Blog Hop Winner

Thanks SO much to everyone who participated in our very FIRST Blog Hop! I hoped you enjoyed visiting our Design Team's blogs as much as I did!

CONGRATULATIONS to Carla from Utah!! Thanks for participating in our blog hop Carla! You are the winner of 2 stacks from DCWV! Please e-mail me your address and I will get those stacks right out (info@scrapbookusaexpo.com).


DCWV has some DARLING Holiday stacks this year!! I have just started playing with them and I love each of them! Whether you want something thick for crafting or a lighter weight printed paper there is something for everyone!

Watch this youtube video and see all of them!

Thursday, November 8, 2012

Give Thanks Holiday Layout

If you are here for the Scrapbook USA Expo Blog Hop, Welcome!! Scroll down to Monday's post and join the Hop!


Ah, Thanksgiving!  I love this time of year -- all the warmth and love and gratitude we share with each other so freely.

I'm thankful today that I get to share a pretty layout as well as some more exciting news! I'm Tomi Ann and  I've been asked to join the Design Team for the ScrapbookUSA Expo.  Twice a year for the last 6 years, my crafty friends and I have gotten together at the ScrapbookUSA Expo for a day of awesome scrapbooking deals, silly games and prizes, and lots and lots of scrapbooking. I love it!  There are such good deals to be had that I end up getting nearly all my supplies during that twice a year spree.  So I was delighted when I was chosen for their first-ever design team.


For my first project, I got to play with the gorgeous Autumn Melody stack from DCWV.  I love these coordinating stacks -- they make it so easy to put together beautiful projects.  For this layout I cut a lot of hexagons from 8 different patterned papers, then used the coordinating cardstock matstack to create some photo mats.  The "Give Thanks" label is a cut out from the same stack.  I added a few buttons and some stamped leaves (using a Close to My Heart stamp), and finished off the layout with some ribbon and orange chipboard numbers from October Afternoon.  I can't wait to take some great pictures this Thanksgiving to fill up this layout!

Wednesday, November 7, 2012

Picture That Sound And MME Memory Box Gift

If you are here for the Scrapbook USA expo Blog Hop. WELCOME!  Click Here

Hello!  Andrea here with a great gift idea as the holidays approach.  I wanted to create something handmade that was pretty to look at, but also had the POW of emotional impact.  The result?  This memory box!


So what's the theory of a "memory box" and how did I create it?  I wanted to make something for my mom, who has filled my life with gifts from her talented sewing hands.  She made me beautiful clothes while I was growing up, she sewed a quilt for me when I got married, and she kept my dolls stylin' when I was a kid by surprising me with new outfits for them.  She is so talented in any sort of handwork and I wanted to honor her for that.  So I put together some notions and fabric to fill the inside of the box:


On these items, I wrote some of my favorite sewing-related memories of her (stamped onto the cloth that unrolls from the spools, written on the back of the button packages, etc.).

Next, I included this nifty recordable card from  Picture that Sound (Special web code at the bottom of the post).  It's a company that makes cards which you can embellish and record a message onto.  You get 20 seconds of recording time to leave just the right sentiment for your loved one.

The card started out like this:


(Front and back views-- you can decorate either side)


And I made it into this.  My mom will just push the "play" button on the back to hear my message.


Adding a personalized message instantly makes any gift more memorable!  So with the notes written to my mom on the sewing notions and a card with a recorded message, I'm hoping she'll see just how much I love and cherish the beautiful things she's made me over the years.


For this project, I used paper, stickers and embellishments from "The Sweetest Thing" collection from My Mind's Eye.  Always LOVE pretty much anything that MME cranks out!  I also used stick pins from Maya Road and flowers from Prima, some of my other favorite brands.


So if you're struggling to know what to give someone this year, try a memory box filled with things they love, and reasons why you love them, too!  And keep checking my blog for other great holiday ideas!

Shop early!! Picture That Sound has their products Buy 1 Get 1 Free for a limited time! visit them at www.picturethatsound.com and use the code "EarlyBird" to save!